If you log a lot of hours a week, click-and-type per row is too slow. So the timesheet is built like a spreadsheet: you select ranges the way you would in Excel, edit several entries at once, and use shortcuts for everything you do often.
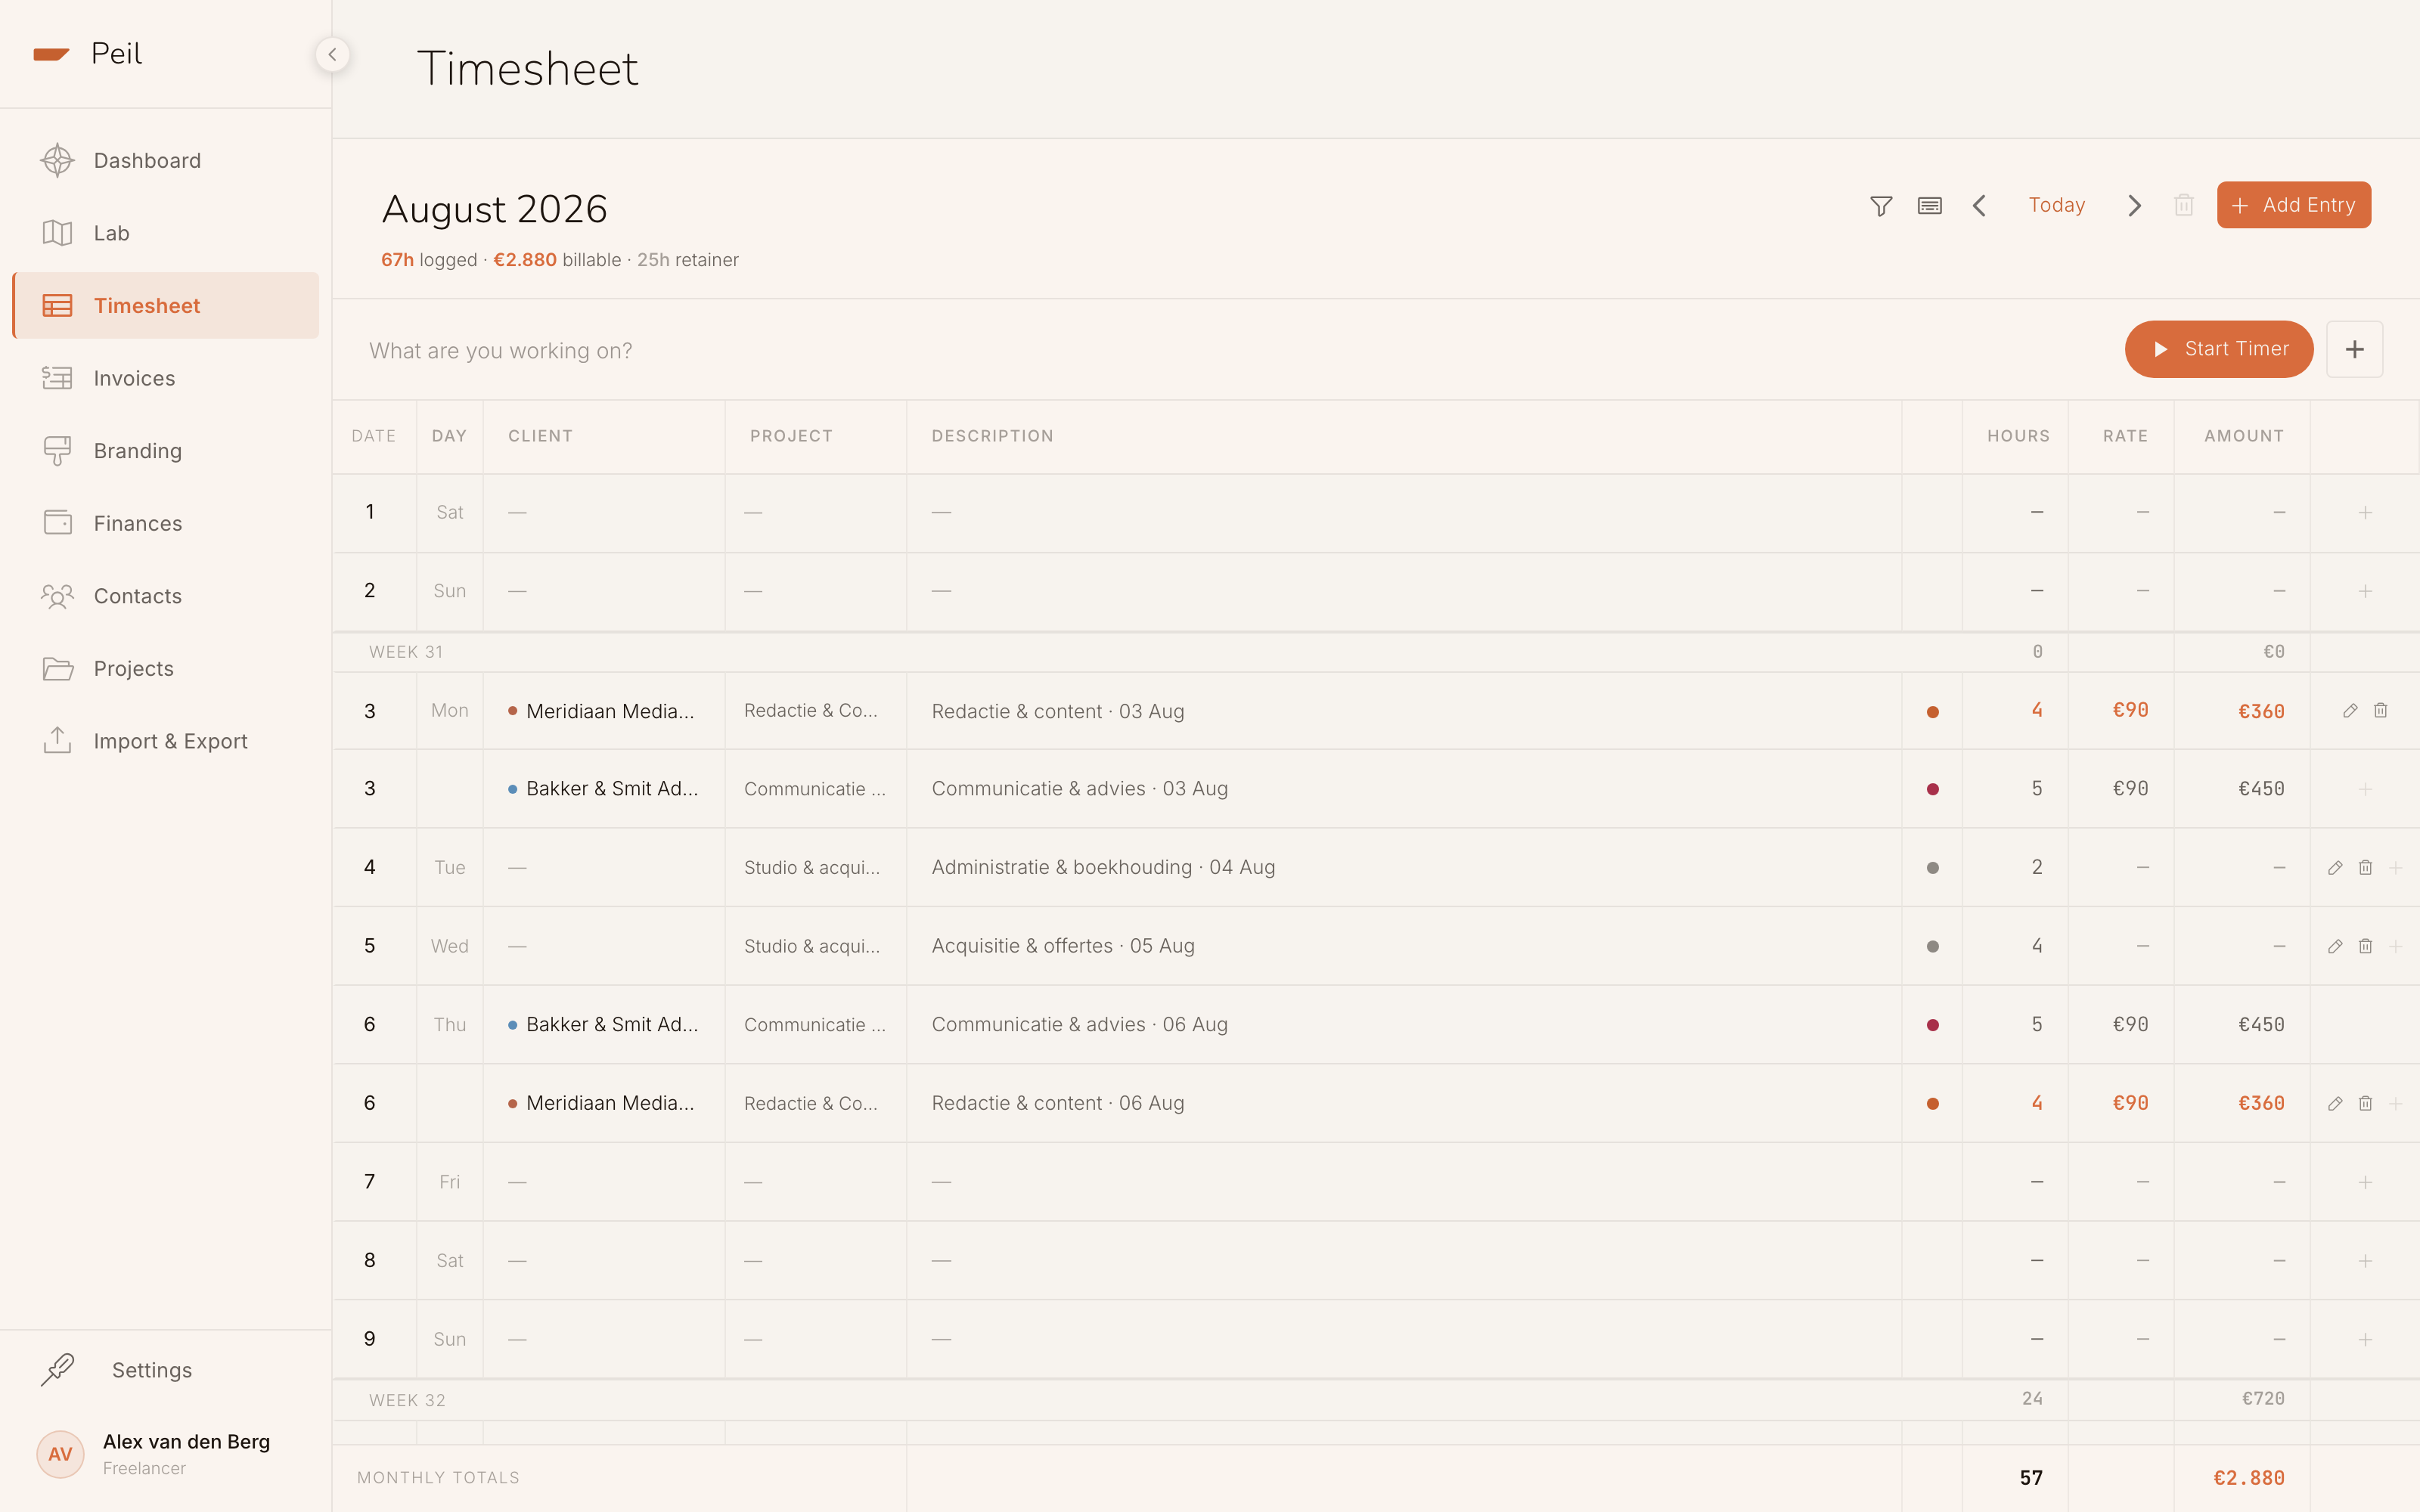
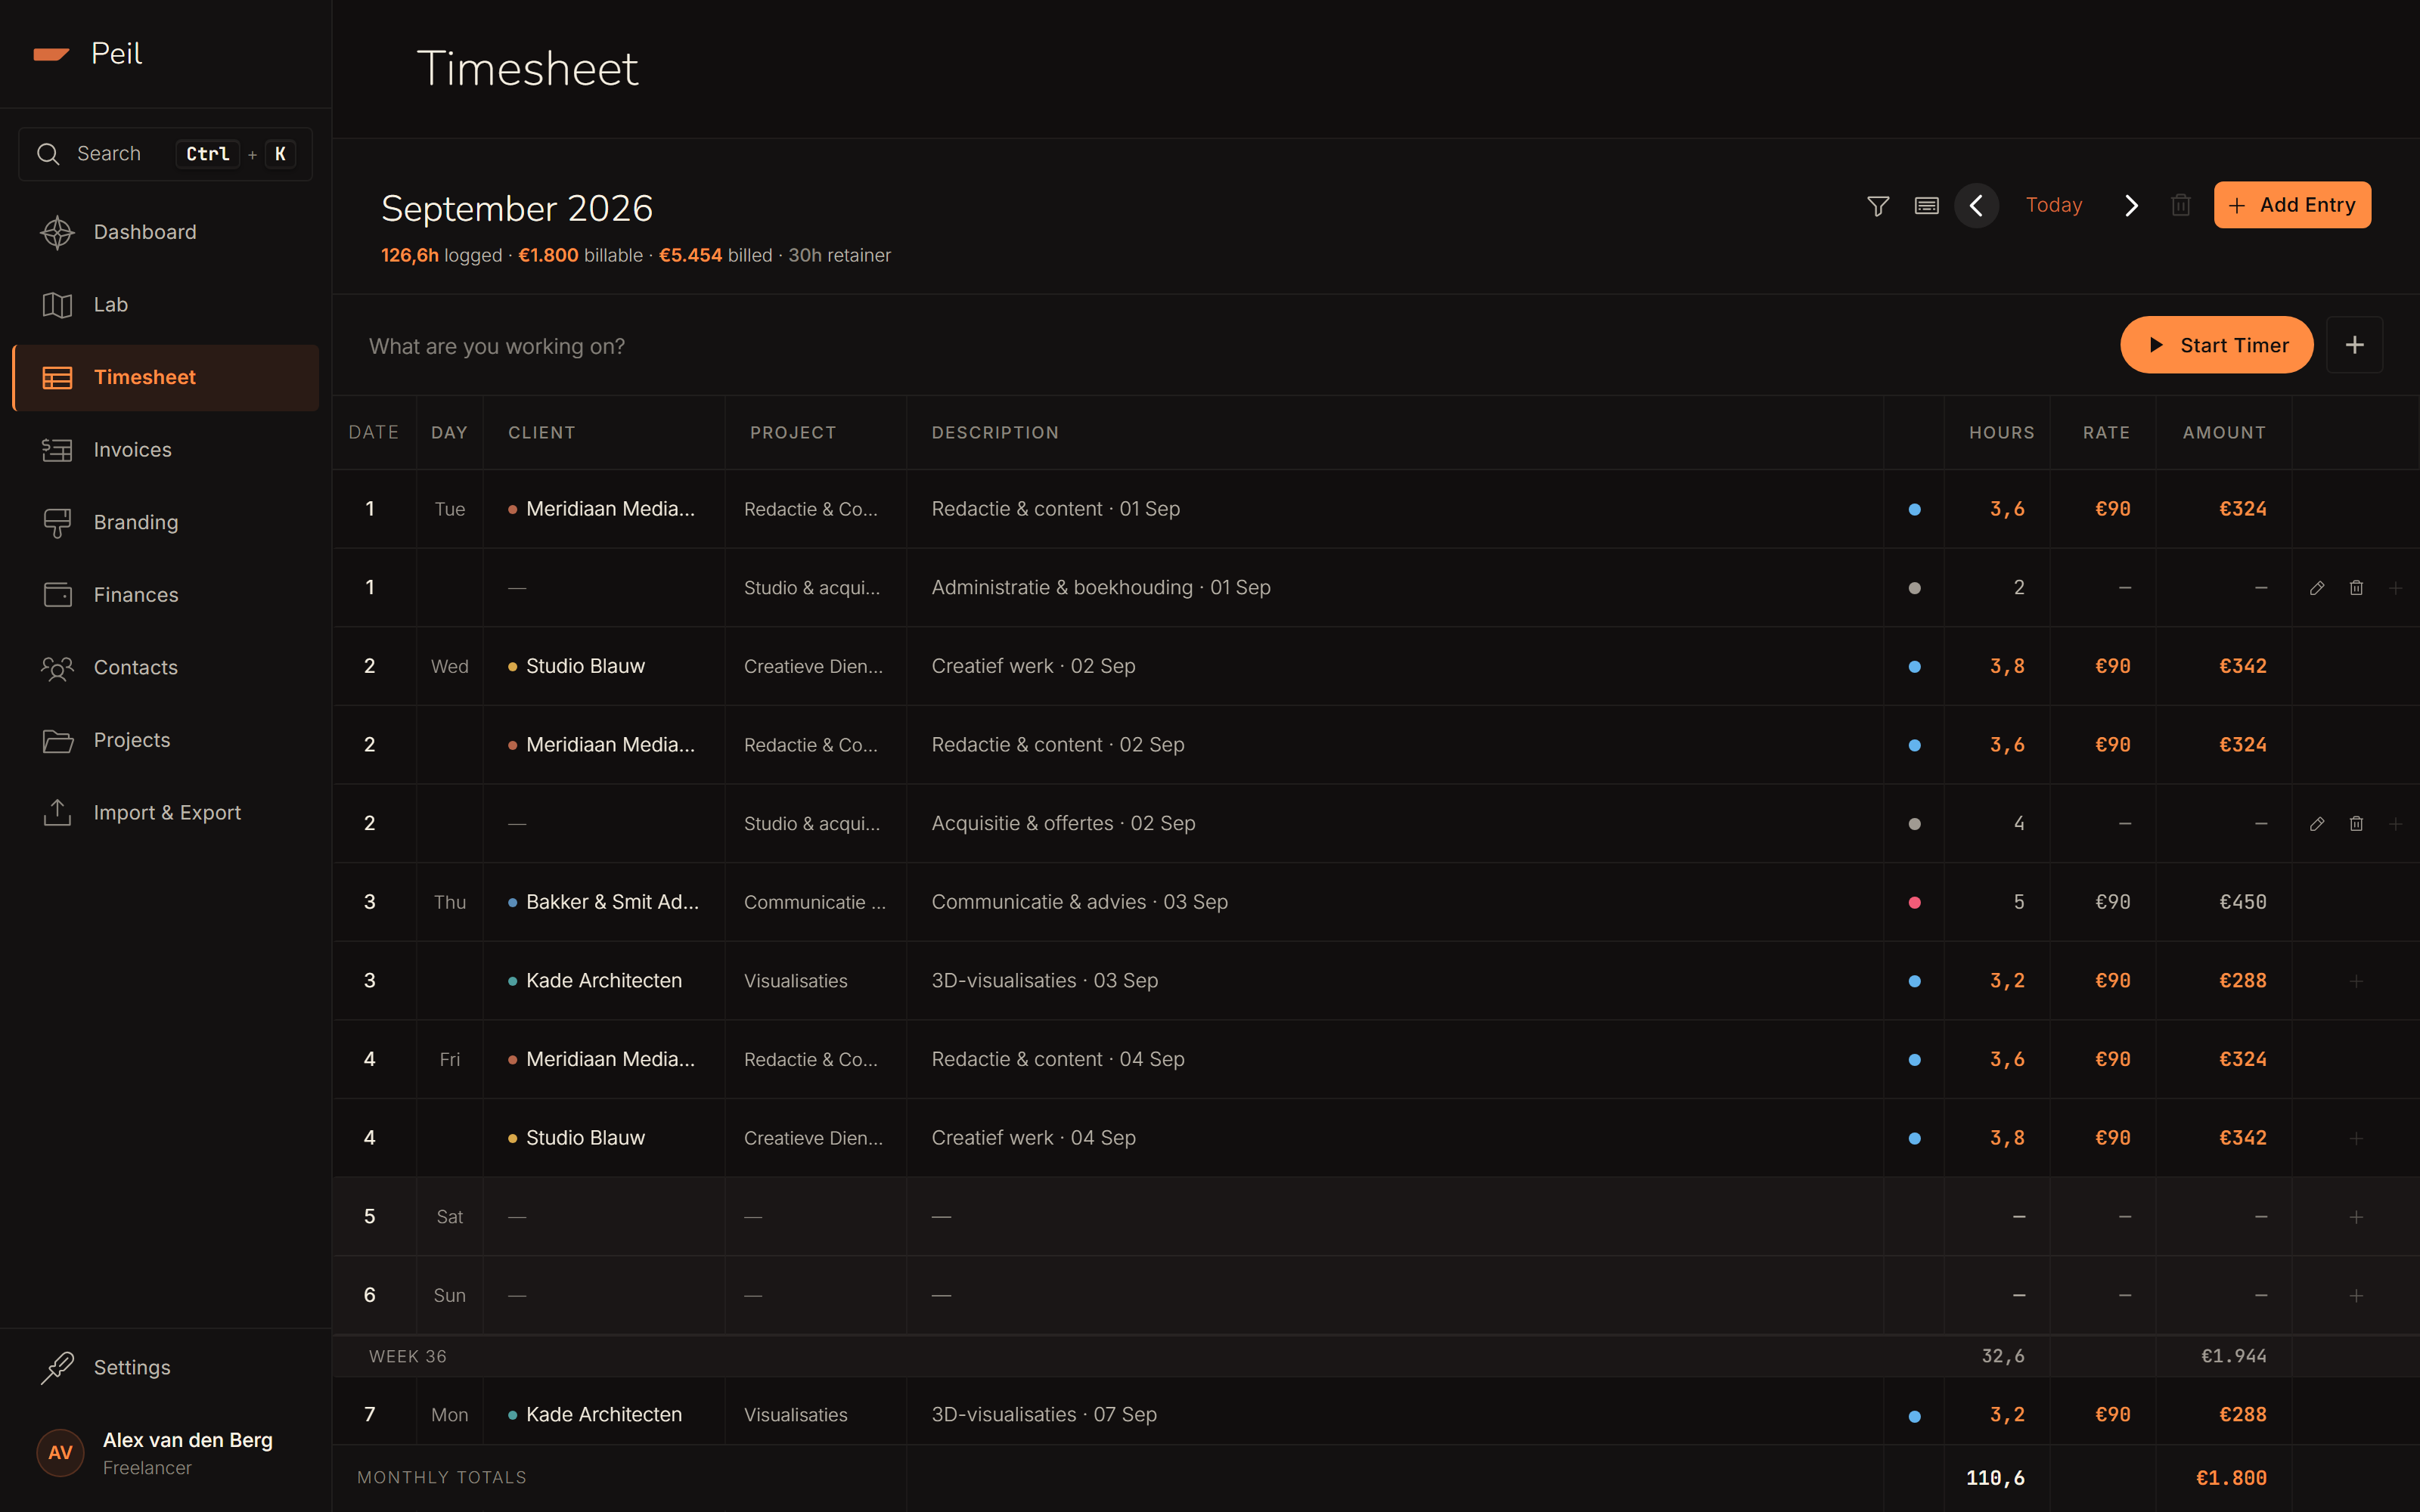
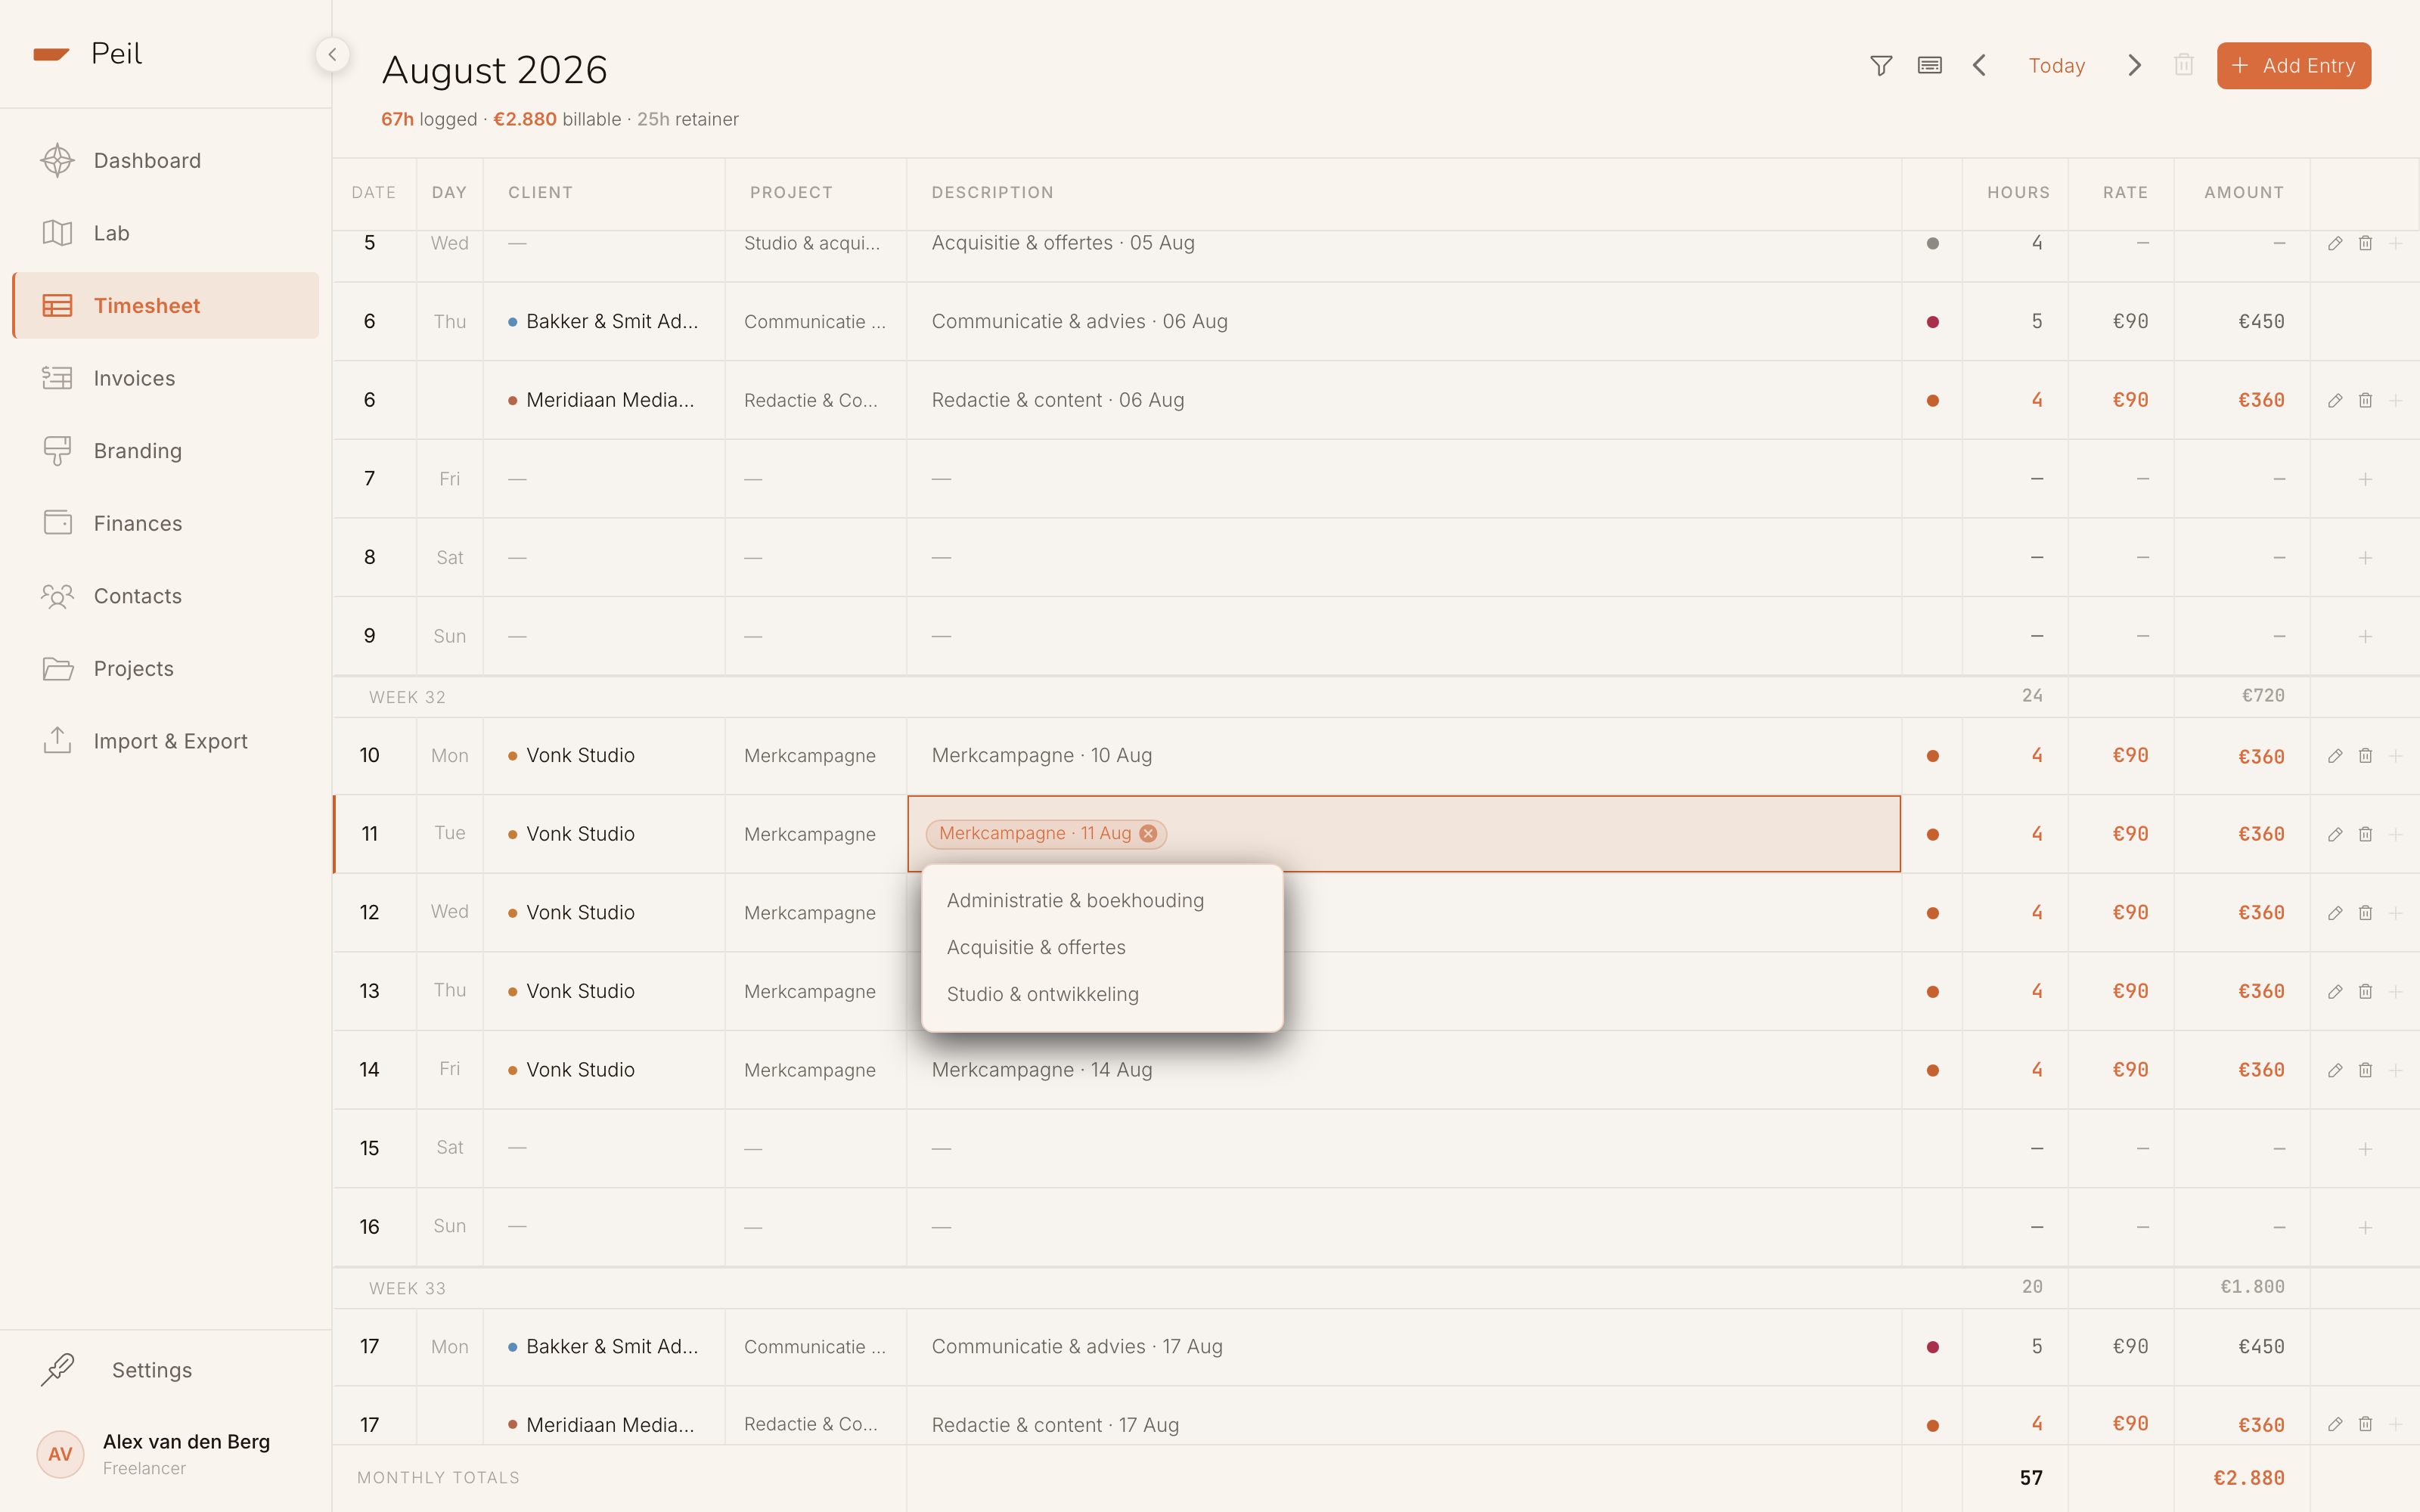
The timesheet: each row is an entry, grouped by week with weekly totals.
Reading the status dots
Every entry is either billable or internal: billable hours are what you invoice to a client and count toward your NER; internal hours (overhead, business development, admin) you track for your own insight and they don't drag your NER down.
The dot in front of each row tells you at a glance where those hours stand: still to be invoiced, already on a (draft) invoice, paid or overdue. Solid means committed; a hollow ring means still in motion, such as a draft or work on a fixed price or retainer. Clicking an invoiced row opens the invoice it belongs to.
Selecting a range
Click the date cell on the left of a row to select that entry. Hold Shift and click
another row to select everything in between at once, exactly like a spreadsheet. With
⌘/Ctrl-click you add individual rows to an existing selection without losing the
rest.
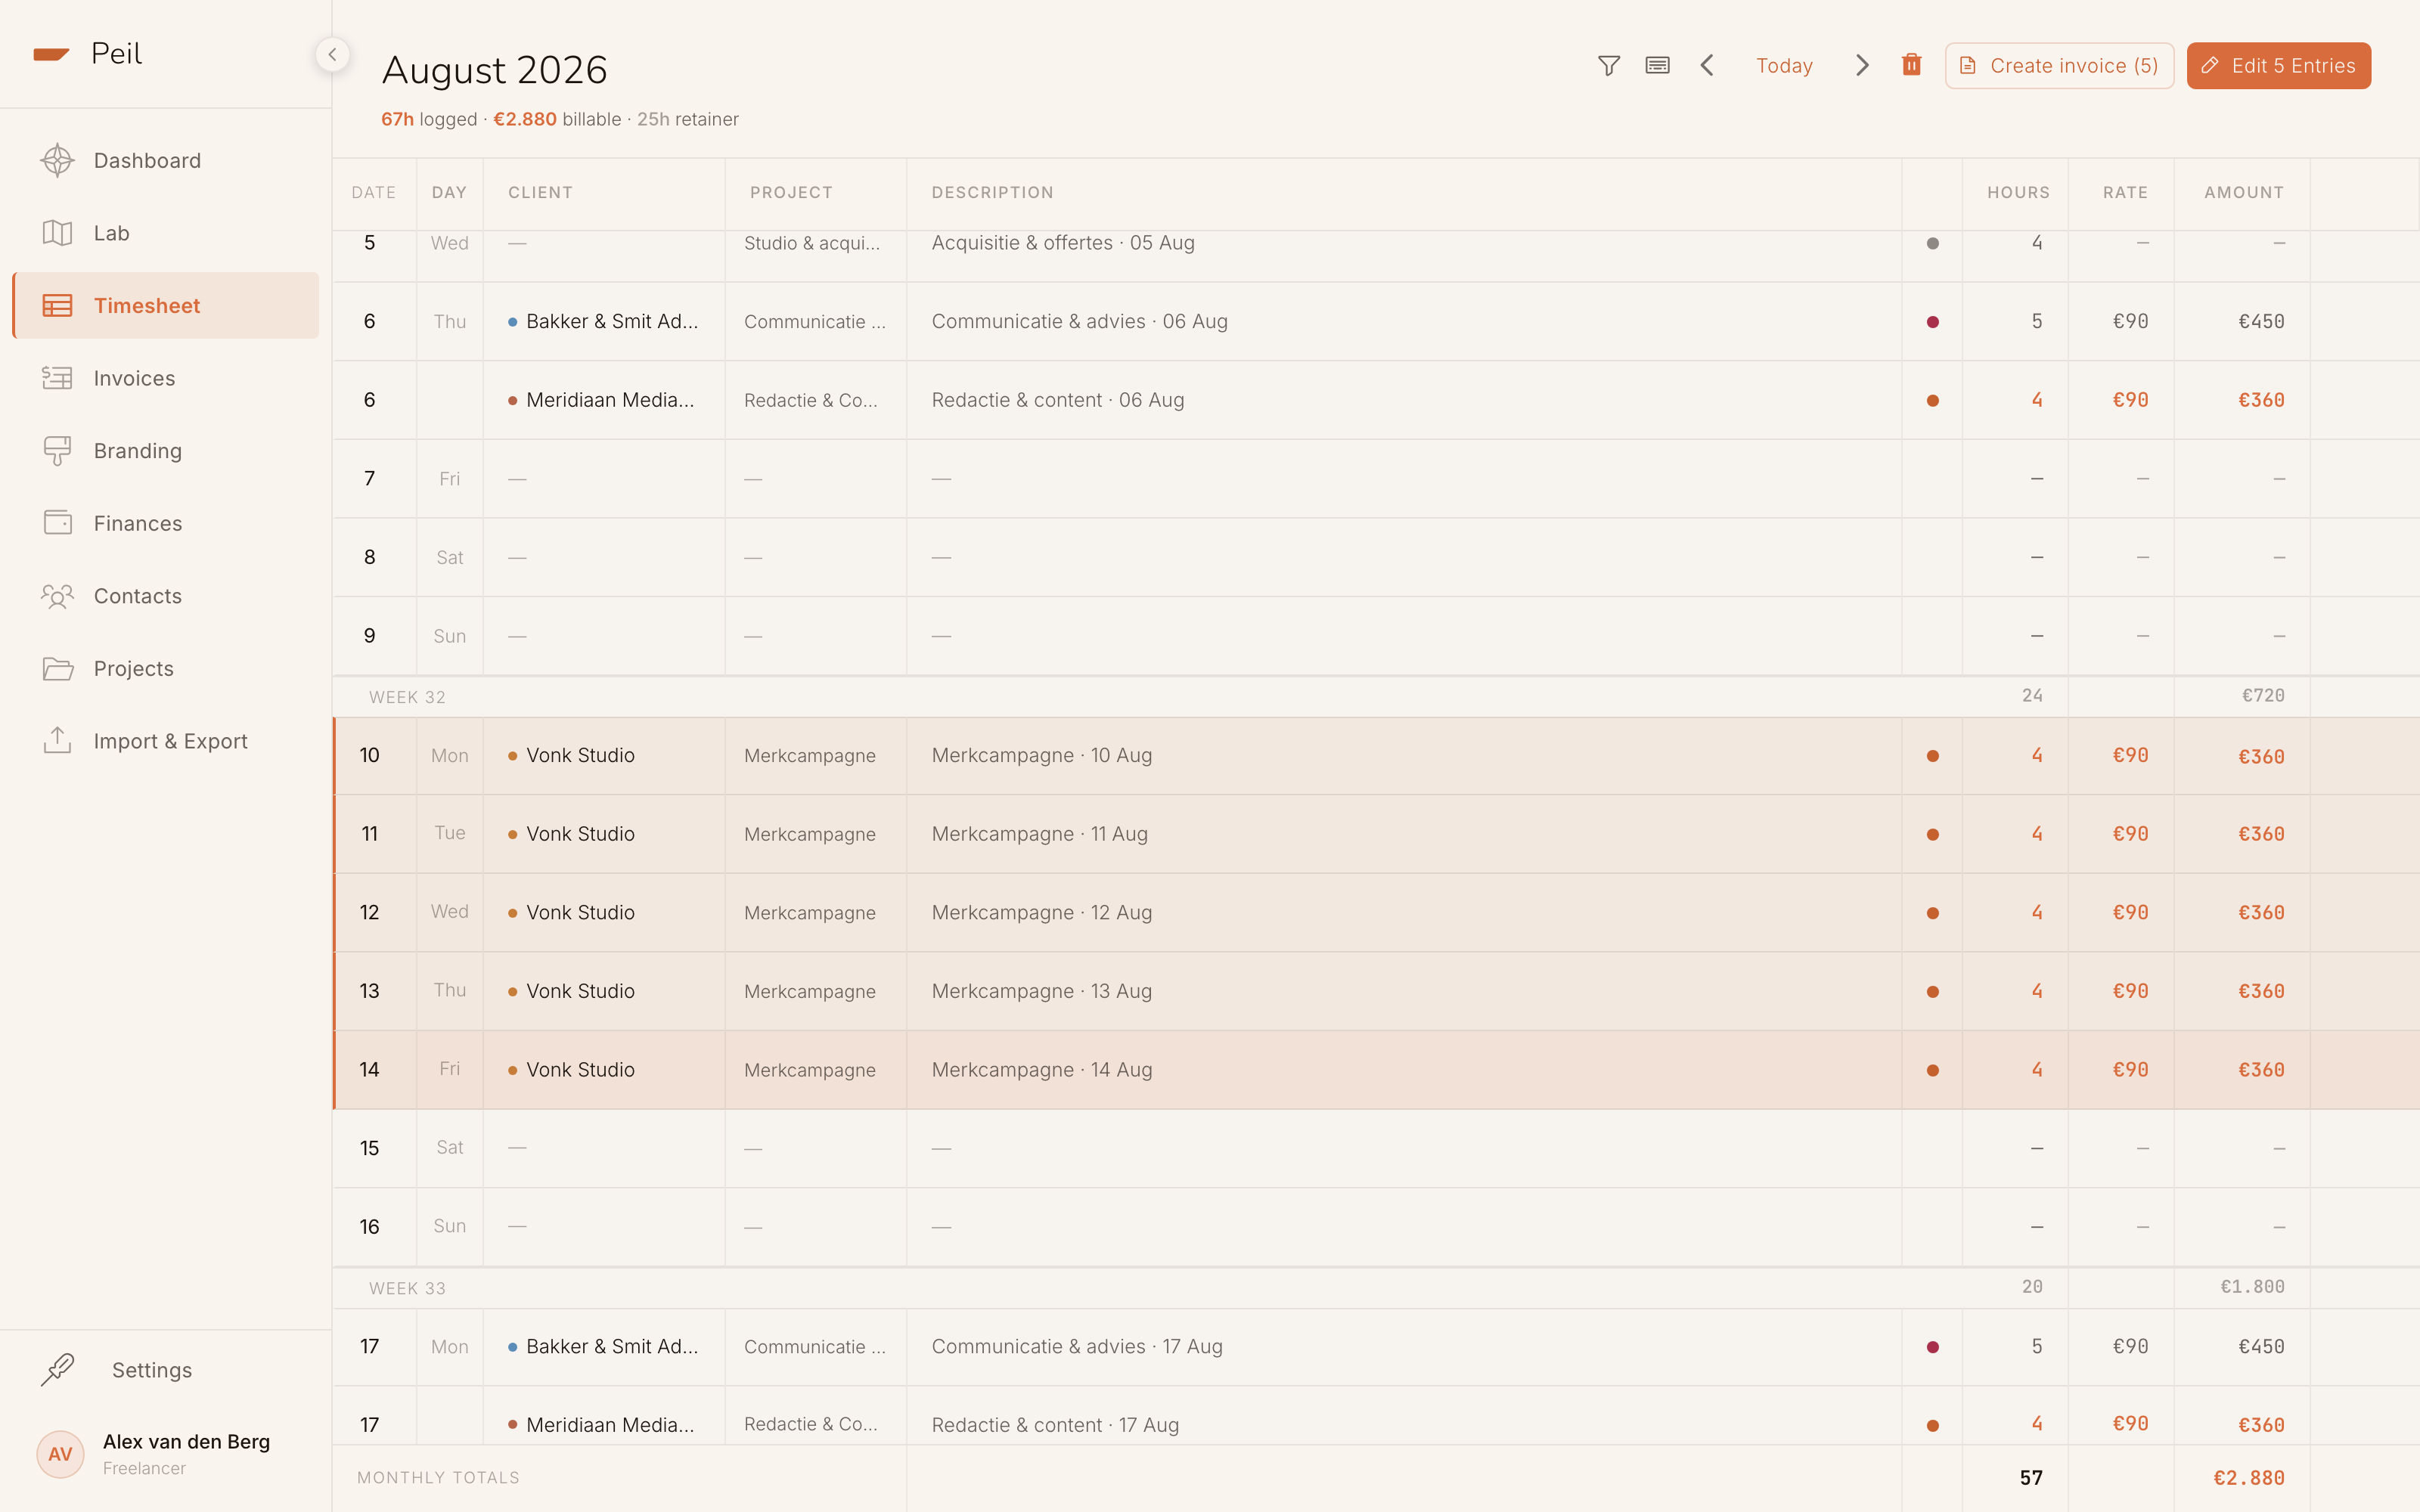
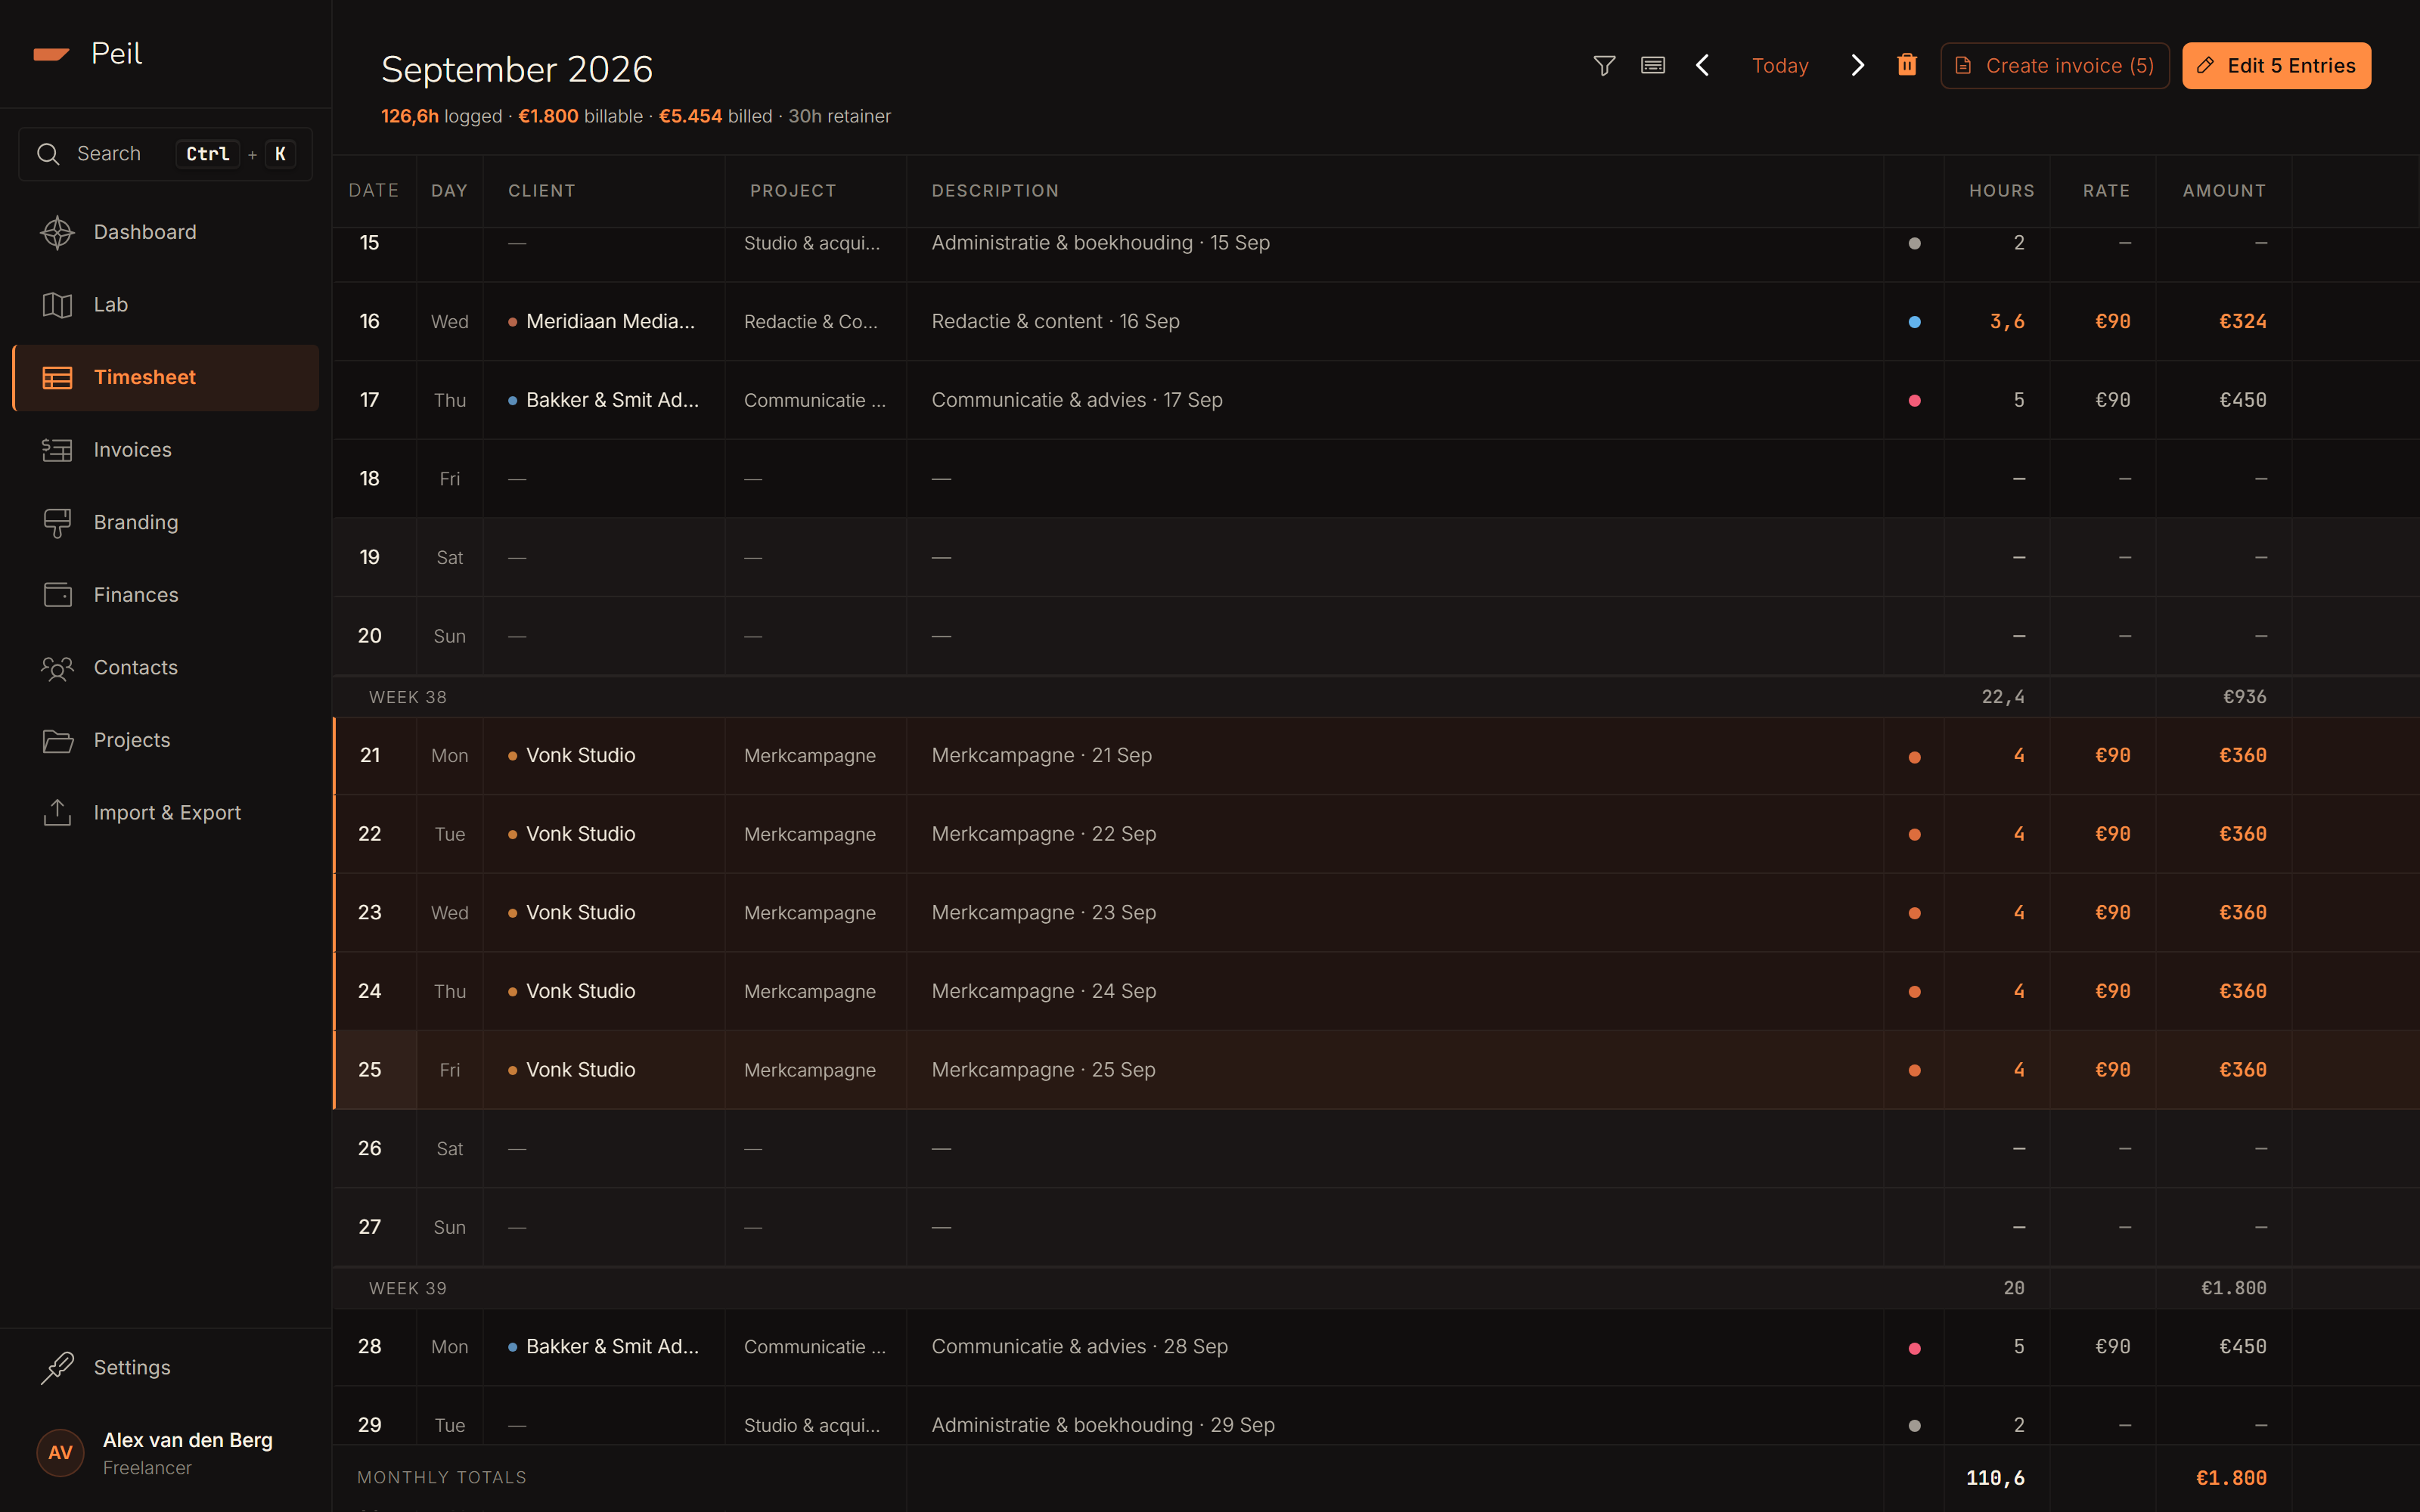
Shift-click selects the whole range between the first and last click.
Editing several entries at once
As soon as you select more than one row, the button top-right becomes "Edit [count] entries". With it you apply a client, project, hours, rate, activities or the billable status to the whole selection at once. Handy after a day of five identical rows for the same client.
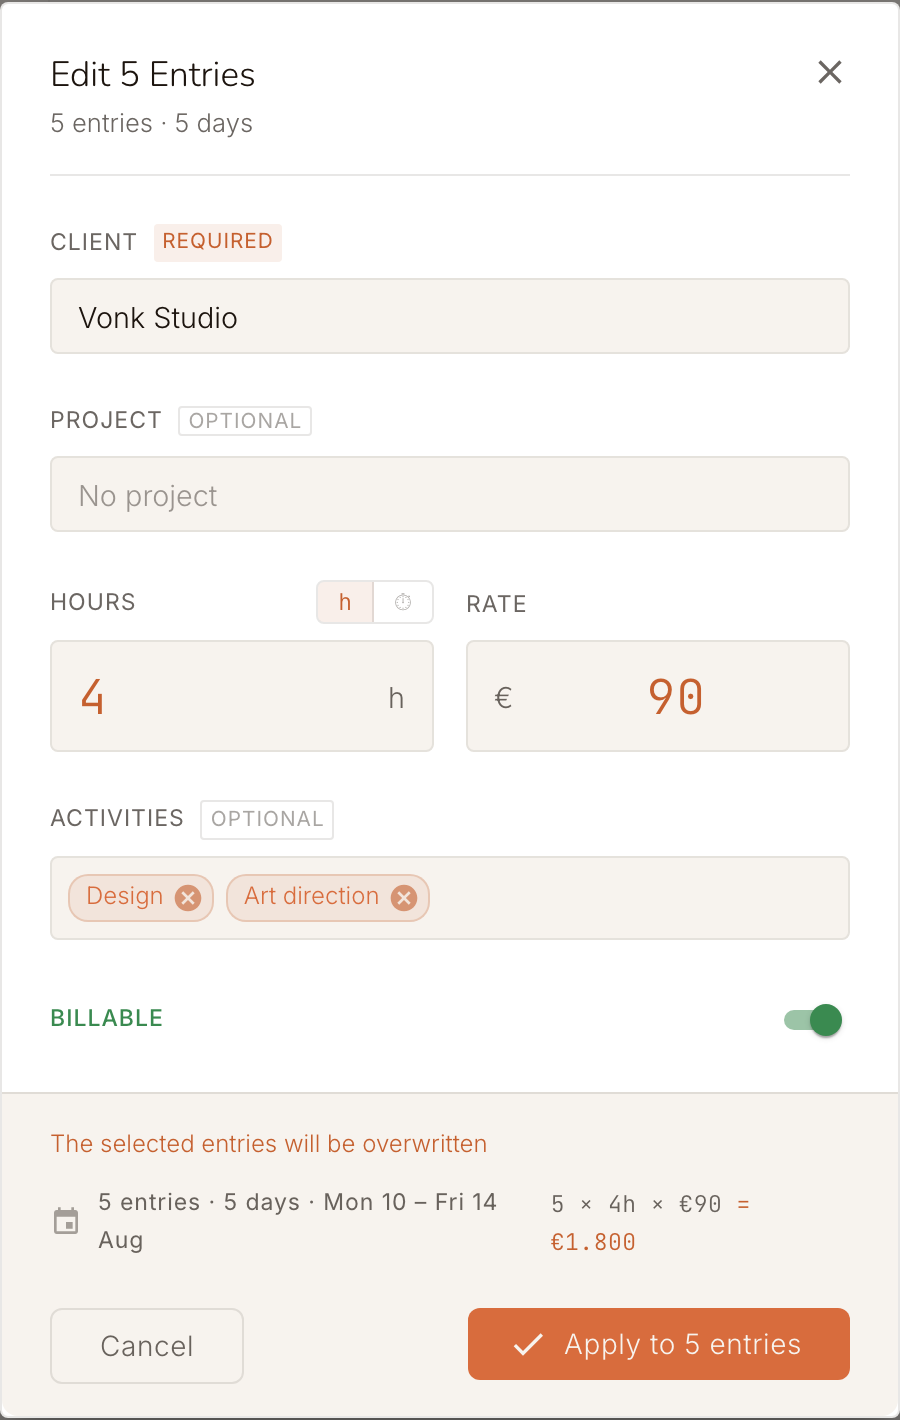
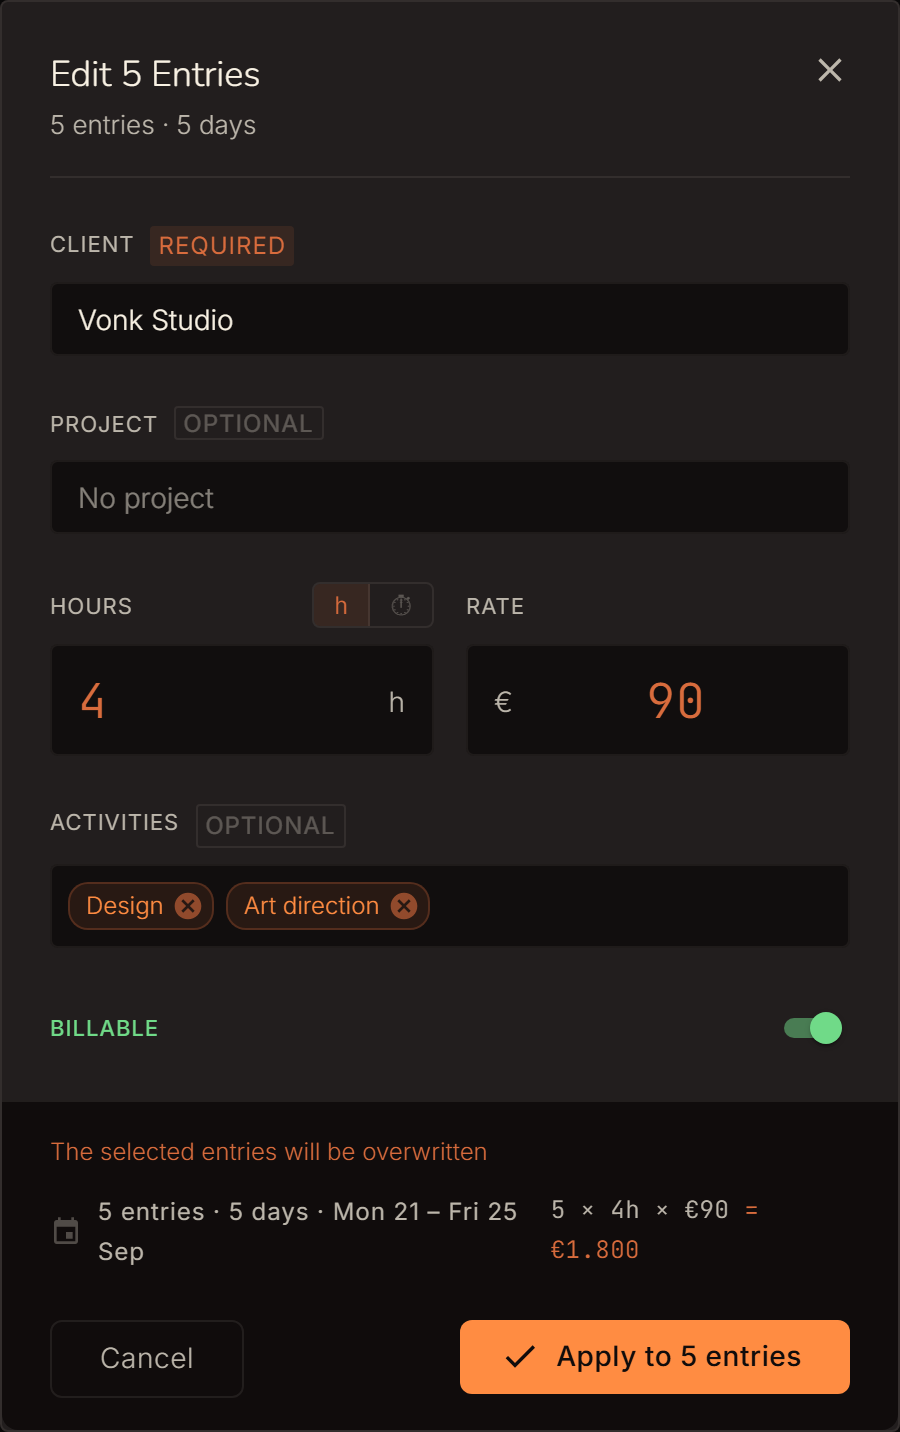
At the bottom you see live what the change means before you confirm it.
Only the fields you fill in are overwritten. Leave a field blank and each row keeps its existing value — handy when the rows already differ from one another.
Editing a cell directly
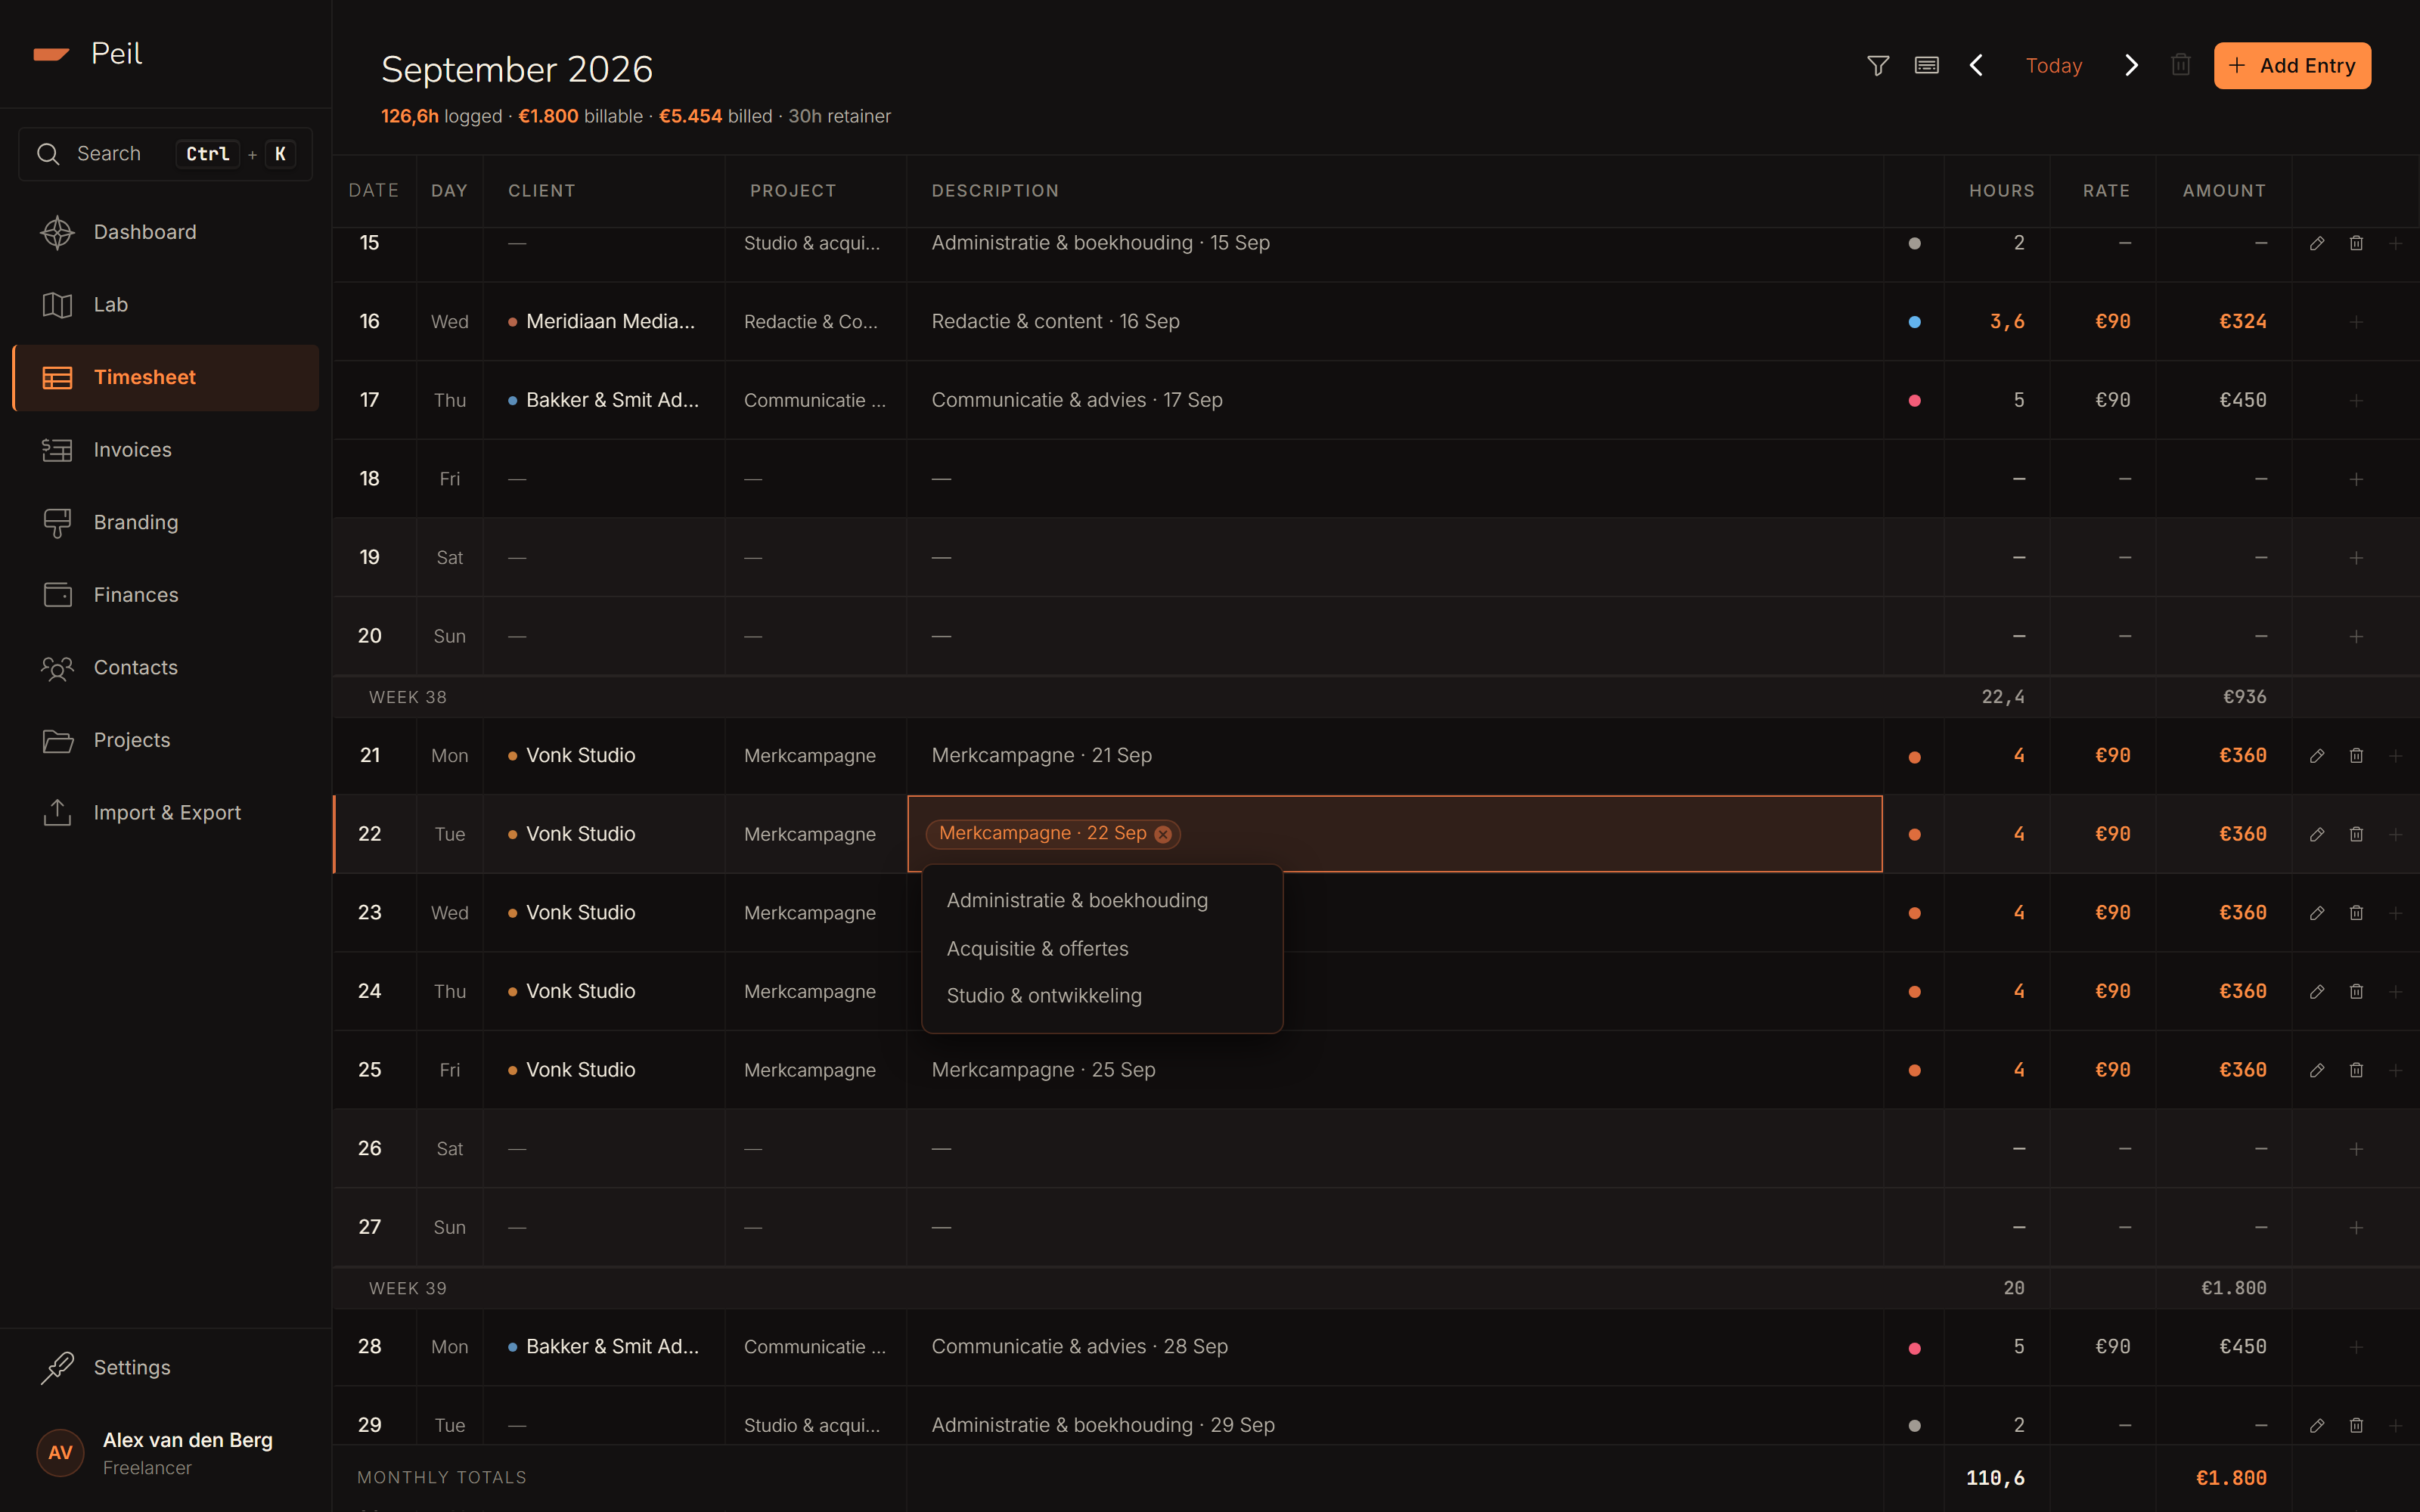
Click a cell to select it and press Enter to edit, or double-click straight away.
Changes to the description also flow into that entry's activities.
Copy and paste from Excel
Select rows and press ⌘/Ctrl+C to copy them as tab-separated text
(TSV). Paste that straight into Excel or Google Sheets. It works the other way too: copy rows
from a spreadsheet and paste them with ⌘/Ctrl+V into the timesheet to
create them as new entries.
Peil recognizes numbers as hours and rate regardless of which column they sit in, and recognizes a date when it comes first. For the most reliable result we recommend this column order, without a header row:
Date        Client  Project   Description          Hours  Rate
2026-08-20  Acme    Website   SEO improvements     8      23
If Peil doesn't recognize a client or project name, it creates one automatically and links the entry to it. New projects get the type "Folder".
All shortcuts at a glance
Click the keyboard icon next to the date navigation, or press ?, for the full
overview:
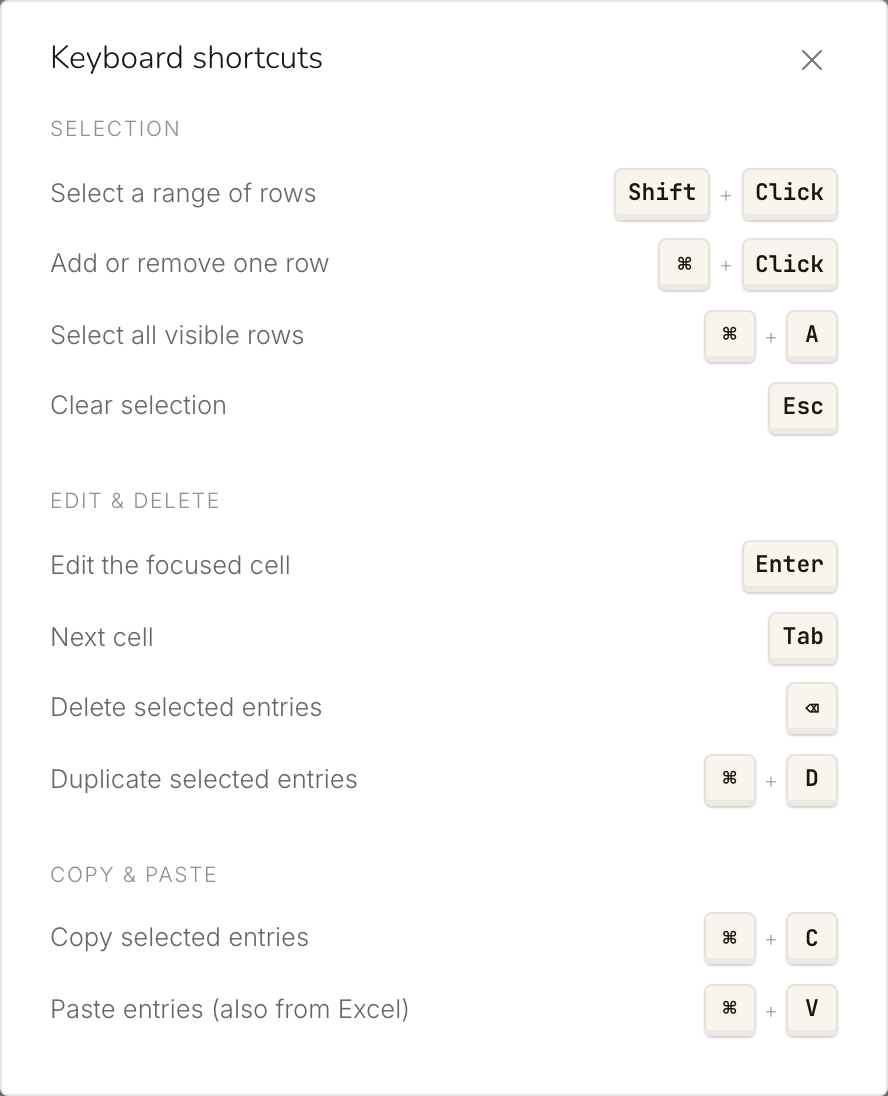
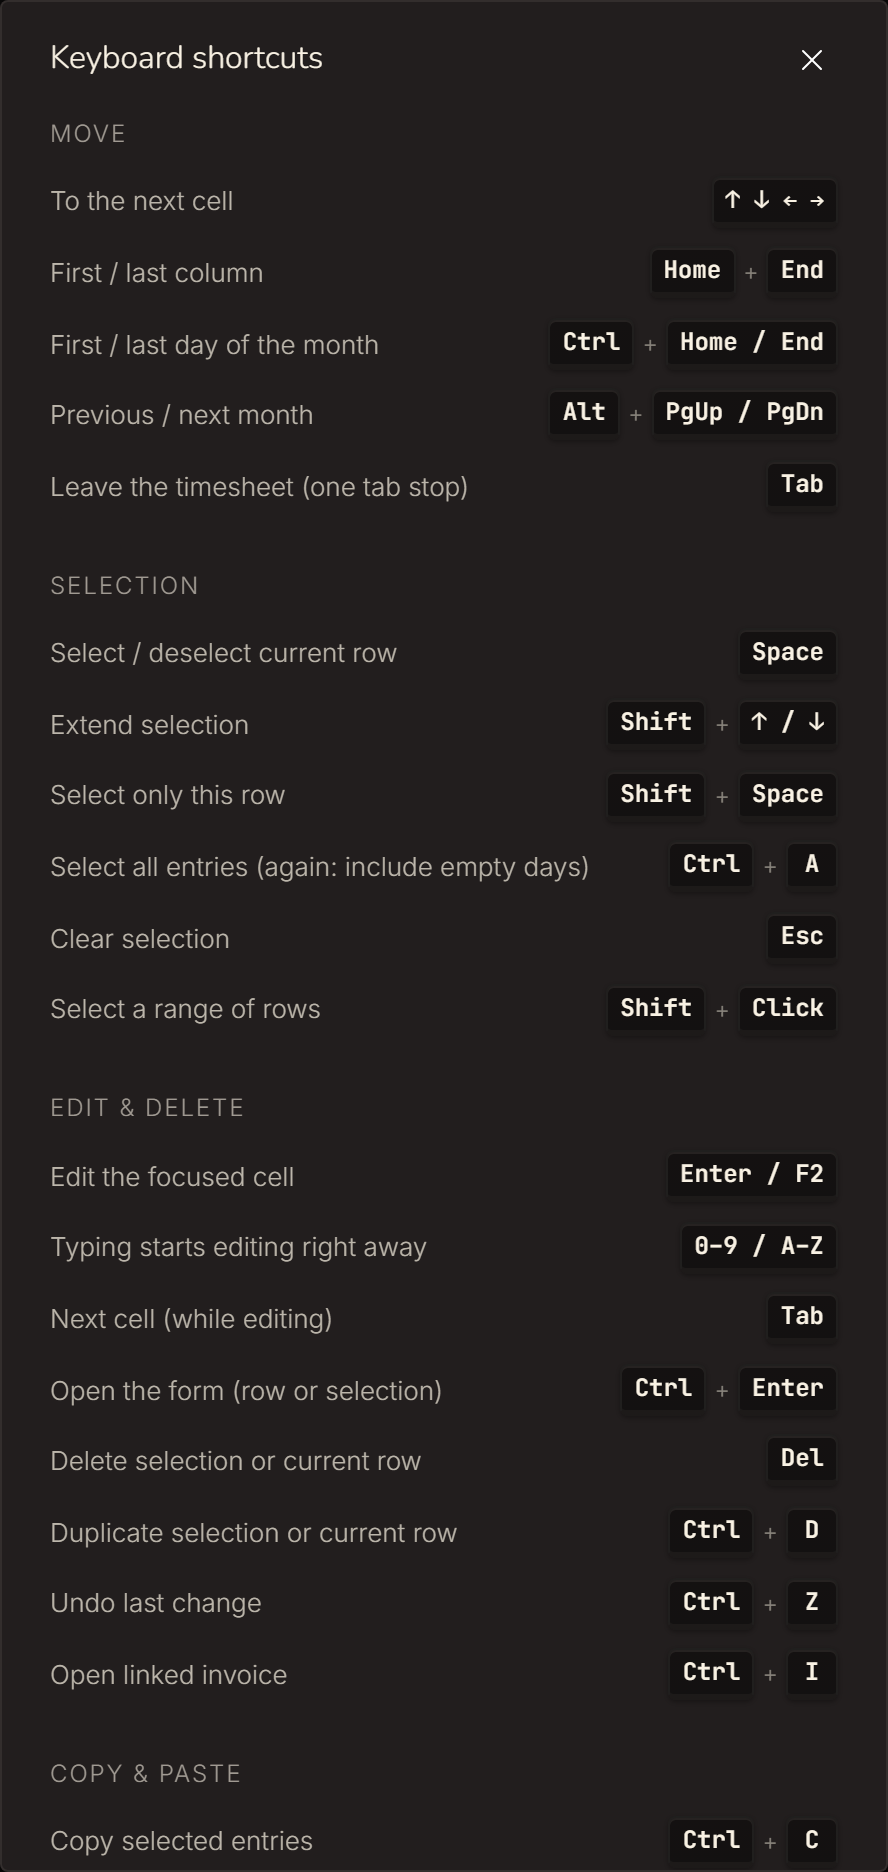
| Action | Shortcut |
|---|---|
| Select a range of rows | Shift + click |
| Add/remove a row to/from the selection | ⌘/Ctrl + click |
| Select all visible rows | ⌘/Ctrl + A |
| Clear the selection | Esc |
| Edit the selected cell | Enter |
| Next cell | Tab |
| Delete the selected rows | Delete |
| Duplicate the selected rows | ⌘/Ctrl + D |
| Copy | ⌘/Ctrl + C |
| Paste (also from Excel) | ⌘/Ctrl + V |
You can undo a deletion right away. Peil briefly shows an "undo" toast after you delete.
See also Creating and sending an invoice for how to turn these entries into an invoice.